Tag: Vegetarian

Mediterranean Rice Salad with Lemon & Herbs (Easy Make-Ahead Side)

Mediterranean Rice Salad with Lemon & Herbs (Easy Make-Ahead Side)

Bright and herby Mediterranean Rice Salad with lemon, olives, fresh herbs, and a gentle Southwest kick. This easy make-ahead side dish is perfect for picnics, potlucks, and simple weeknight meals.

Black-Eyed Peas and Broccoli Salad Recipe: Pick Your Own Spice Level

Black-Eyed Peas and Broccoli Salad Recipe: Pick Your Own Spice Level

A crunchy, spicy, and fresh-tasting salad starring black-eyed peas and broccoli—perfect as a side or light main. Quick to make, big on flavor, and even better the next day.

Wild Mushroom Lasagna with Zippy Sicilian Flair

Wild Mushroom Lasagna with Zippy Sicilian Flair

Wild mushroom lasagna is writ large on my history with The Grill-Meister, and it’s high time for us to share it with you here in the blog. This is a marvelous dish, redolent with garlic, rich with wild mushroom umami and rounded out by the rustic and comforting marinara. The cheese doesn’t hurt, either.

Just look at that moist, rich bite – it’s love on a plate!

Zippy Sicilian Wild Mushroom Lasagna

Ingredients

  • 9 lasagna noodles
  • 2 lbs. mixed wild mushrooms (shiitake, oyster, cremini, portobello, lion’s mane, chanterelle, hen of the woods, etc.), cleaned and roughly chopped
  • 2 tbsp olive oil
  • 3 cloves garlic, minced
  • 2 tbsp Zippy Sicilian seasoning (plus more to taste), or your favorite Italian spice mix
  • 1 tsp kosher salt, divided
  • 1 tsp freshly ground black pepper, divided
  • 15 oz ricotta cheese
  • 1 large egg
  • 2½ cups shredded mozzarella cheese (about 12 oz total, divided)
  • ½ cup finely shredded Asiago, Parmesan or Romano cheese
  • 5–6 cups marinara sauce (see our Glover Gardens recipe for homemade – recommended!)
  • Fresh basil or parsley, for garnish (optional)

Cooking Instructions

  1. Preheat the oven to 375°F.
  2. Cook the noodles: Boil 9 lasagna noodles in salted water until al dente, following package directions. Drain and lay flat on a baking sheet in layers, separating with lightly sprayed wax paper to prevent sticking.
  3. Sauté the mushrooms: In a large skillet, heat 2 tbsp olive oil over medium heat. Add 3 cloves minced garlic and cook until fragrant, about 30 seconds. Add 2 lbs. chopped mushrooms and sauté until deeply browned and their liquid evaporates, 10–12 minutes. Season with 1 tbsp Zippy Sicilian seasoning, ½ tsp kosher salt, and ½  tsp black pepper. Remove from heat.
  4. Make the ricotta mixture: In a medium bowl, combine 15 oz ricotta, 1 large egg, 1 cup shredded mozzarella, ½ cup Asiago, ½ tsp kosher salt, ½  tsp black pepper, and 1 tbsp Zippy Sicilian seasoning. Stir until smooth.
  5. Assemble the lasagna: Spread 1 cup marinara sauce over the bottom of a 9×13 baking dish. Place 3 noodles in a single layer. Using a slotted spoon for the mushrooms, top with ⅓ of the mushroom mixture, and then with a regular spoon, add 1½ cups marinara, and ⅓ of the ricotta mixture. Repeat twice more (noodles, mushrooms, marinara, ricotta). Finish with the last 3 noodles, 1½–2 cups marinara, and the remaining 1 cup mozzarella sprinkled evenly on top.
  6. Bake: Cover the dish loosely with foil (sprayed with cooking spray so it doesn’t stick to the cheese). Bake for 25 minutes. Remove the foil and bake another 20 minutes, until the top is bubbling and golden.
  7. Rest and serve: Let the lasagna rest for 15 minutes before slicing. Garnish with fresh basil or parsley if desired.

Notes

  • I recommend traditional noodles rather than no-boil. They hold their structure better, help the layers cling together, and give the lasagna its classic texture. This article explains why—and after testing both, I’m a convert.
  • This vegetarian meal can also be gluten-free if you use gluten-free pasta.
  • Even easier: if you’re in a hurry, don’t spend time making our (fab) marinara; just use two 24-ounce jars of pasta sauce (I won’t tell).
  • You can use mushrooms from the grocery store, but the best bet is to get them from your local farmers’ market. They will have a nice variety, the product will be fresh and sustainable, and you’ll be putting your money directly into the local economy. Our mushrooms for this fab dish came from The Mushroom Factory, a local purveyor that sells mushrooms at our famers’ market here in Tomball, Texas.
  • This is a hearty dish, so any side dish should be light and refreshing, like the Two-Bean Salad with Mint and Lemon we created to go with it. You might also want some garlic bread to sop up the yummy mushroom-laden sauce.

Voila!

Check out how fab this recipe looks! Don’t you just want a big plate of it right now???

Join Us in the Kitchen

We didn’t get pics of the ‘shrooms cooking, but I captured the mouthwatering process of layering the lasagna love. The Grill-Meister had the fun job of assembling our masterpiece, while I did the camera work.

The sauce is spread across the bottom, then topped with noodles
Mushrooms come next, and then the cheese mixture
Another layer of noodles starts the next layer after a generous amount of sauce
A 9″ x 13″ casserole is three lasagna noodles wide
The top layer is mushrooms and the cheese mixture, then sauce
Mozzarella is the final step after the top layer of sauce
Lasagna ready to cook, with pepper being added from a grinder.
Ready to cook after a few last turns of the pepper grinder

The Backstory, Which is Also the Love Story

Right after we started dating back in 2006, and the first time I was invited to his home, The Grill-Meister made dinner for me. He had a ‘recipe’ for Wild Mushroom Lasagna from an old issue of Men’s Health magazine and knew it would be a winner. When I arrived, I was greeted with not just a kiss but the tantalizing garlic-heavy aroma of his lasagna bubbling happily in the oven and a glass of wine. He had my number, for sure.

Food is love, I’ve always said. Wine makes it even better.

It was so romantic to have him cook for me, and the lasagna was delicious! His culinary gambit successfully hooked me, and we became an ITEM. It’s 19 years now since we started dating, and we celebrated our 17th anniversary in June.

It Was a Cryptic Recipe

Take a quick glance at the recipe below and you’ll note that the instructions for Make Her Fall in Love Wild Mushroom Lasagna are rather cryptic. It has been difficult for Tom to replicate that marvelous dish over the years, because the instructions are negligible, the amounts a bit vague and the seasoning altogether nonexistent.

More of a set of suggestions than a ‘recipe’

Creating a Repeatable Recipe with Some Glover Gardens Winners: Zippy Sicilian and Our Marinara

All these years later, we decided it was time to standardize. We put our heads together, invited my sister-from-another-mother/ex-sister-in-law/friend over to help, and set about creating our own version of Wild Mushroom Lasagna with a ‘real’ recipe that would be repeatably good. We incorporated my Zippy Sicilian spice mix to liven it up, and used our Zippy Sicilian Marinara as the basis for the sauce.

Every time we make this dish, I’ll remember how enchanted I was the night the Grill-Meister first cooked it for me. And now, all these years later, we’re making new memories with this upgraded recipe that makes enough to feed a family, with enough to box up leftovers.

Our sister photo-bombing the ‘lasagna just out of the oven’ portrait

Let me know how this love-worthy dish works for you.

© 2025, Glover Gardens

Two-Bean Salad with Mint and Lemon: A Fresh Take on Tradition

Two-Bean Salad with Mint and Lemon: A Fresh Take on Tradition

This Two-Bean Salad with Mint and Lemon is bright, fiber-rich, and a little unexpected—a perfect partner for hearty mains like lasagna, barbecue, or roast chicken. Crisp green beans and silky cannellini are tossed in a zesty citrus dressing and finished with toasted nuts for just the right crunch.

Avocado Egg Salad Recipe, with NO Extra Fat!

Avocado Egg Salad Recipe, with NO Extra Fat!

A no-mayo twist on a classic, this creamy Avocado Egg Salad comes together with just a few ingredients. Made at Little House in the Rockies with limited provisions, it’s proof that simple, fresh flavors can still feel like a feast.

“Eat More Vegetables” Rice Pilaf Recipe: So Good You Don’t Know It’s Good for You!

“Eat More Vegetables” Rice Pilaf Recipe: So Good You Don’t Know It’s Good for You!

Rice is such a great side dish for meat or fish, but if you’re cautious about extra calories or carbohydrates, a big serving of plain rice can feel like more than you want. One easy answer: cram it with colorful vegetables! This pilaf amps up the veggie-to-rice ratio, so every serving has less rice and a whole lot more vegetables, without giving up the satisfying flavor and texture that make rice such a great side dish.

And this one hits a home run in the flavor competition.

Don’t despair if you don’t have the exact vegetables on hand. This is a wonderfully flexible recipe, and lots of substitutions work beautifully.

Colorful vegetable rice pilaf served alongside plank-grilled salmon
This rice is so good with our plank-grilled salmon!

“Eat More Vegetables” Rice Pilaf

A colorful, veggie-packed rice pilaf with carrots, peppers, tomatoes, peas, spinach, herbs and toasted nuts, designed to put more vegetables on the plate without sacrificing flavor.
Prep Time 20 minutes
Cook Time 30 minutes
Servings: 6 – 8
Course: Side Dish
Cuisine: American

Ingredients
  

Rice Pilaf
  • 2 – 3 tbsp butter, divided as needed
  • ½ cup carrots halved lengthwise and sliced, about 1 medium carrot or ½ large carrot
  • ½ cup diced yellow or red bell pepper
  • ½ cup diced red onion
  • 4 cloves garlic, minced
  • ½ cup chopped tomatoes, preferably colorful grape tomatoes
  • 1½ cups jasmine rice, rinsed and well-drained
  • 1 cup cooked peas, fresh, frozen or canned, drained
  • 1 packed cup fresh spinach or ½ cup frozen spinach, thawed and drained
  • 2 tbsp fresh oregano or 2 tsp dried oregano
  • Cooking liquid in the amount called for on the rice package, about 2¼–3 cups, using vegetable stock, chicken stock, wine, water or a combination
  • 1½ tbsp Zippy Sicilian spice mix or another Italian seasoning blend
  • ½ tsp salt, if your seasoning blend does not contain salt
  • ½ cup chopped toasted nuts, slivered nuts or roasted nuts
Optional Garnishes
  • Sliced green onions, chopped parsley or additional oregano

Instructions
 

  1. Melt 2 tbsp butter in a large saucepan over medium heat. Add the ½ cup carrots and sauté for about 2 minutes.
  2. Add the ½ cup bell pepper, ½ cup red onion, 4 cloves minced garlic and ½ cup tomatoes. Sauté for another 2–3 minutes.
  3. Add the 1½ cups rice and continue to sauté for 4–5 minutes, stirring frequently, until the rice is lightly toasted. Add up to 1 tbsp additional butter if the mixture becomes dry.
  4. If using raw, untoasted nuts, add the ½ cup nuts with the rice so they toast in the pan. If using already-toasted or roasted nuts, reserve them until the end.
  5. Stir in the 1 cup peas, spinach and oregano.
  6. Add the cooking liquid in the amount appropriate for the rice you are using, along with the 1½ tbsp Zippy Sicilian seasoning and ½ tsp salt if needed. Stir well and bring to a boil.
  7. Reduce the heat to low, cover and cook according to the rice package directions, about 15–20 minutes for most white rice. Do not lift the lid during cooking.
  8. Remove the lid and test the rice for doneness. Taste and adjust the seasoning if needed.
  9. Stir in the reserved toasted nuts. Remove from the heat, cover and let rest for about 5 minutes before serving.
  10. Garnish with sliced green onions, parsley or additional oregano if desired.

Notes

  • Rice: Jasmine rice is our favorite here, but basmati or regular white rice also work. Use the rice-to-liquid ratio and cooking time recommended on the package for the variety you choose. Rinsing the rice before cooking helps keep the grains from sticking together.
  • Cooking liquid: Stock adds much more flavor than plain water. A splash of wine can replace part of the stock or water for even more depth.
  • Vegetables: This recipe is flexible. Substitute other vegetables in roughly the same amounts, keeping in mind that especially watery vegetables or mushrooms may affect the moisture balance.
  • Nuts: If the nuts are raw, toast them with the rice. If they’re already toasted or roasted, stir them in at the end so they stay crisp.

Tried this recipe?

Tell us how it went! →

Make It Your Own

One of the best things about this rice pilaf is how forgiving it is. No carrots? No problem. No tomatoes? Same! Zucchini, other squash, broccoli, green beans, asparagus, corn, kale and mushrooms can all play nicely here.

Try to keep the vegetable amounts in roughly the same range—about ½ cup of each, or up to 1 cup for corn—so the rice still cooks properly. Mushrooms are the exception worth watching because they have their own moisture personality.

The same flexibility applies to the nuts. Sliced almonds are classic, but toasted pecans, walnuts, pistachios or even a chopped snack-nut mixture can work. If the nuts are already toasted, stir them in at the end so they keep their crunch.

You can also add leftover cooked chicken, pork, beef, fish or tofu if you want to turn the pilaf into a more substantial meal. But honestly, it doesn’t need the help. I designed it to be a colorful, veggie-laden supporting actor alongside a main dish, and we especially like it with fish.

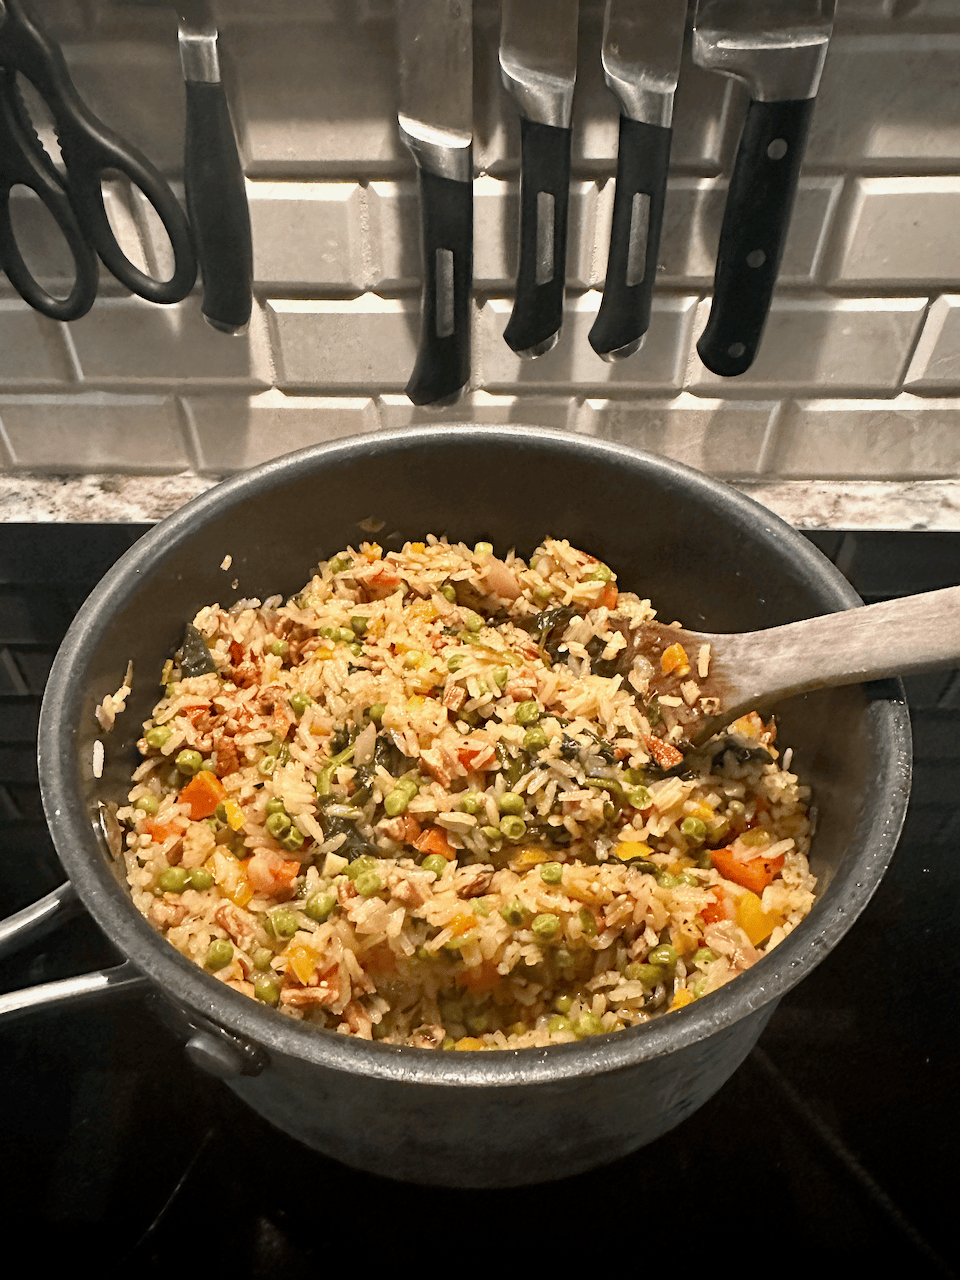
Colorful vegetable rice pilaf served as a side dish
Colorful, flavorful and healthy—what else could you ask for in a side dish???

Join Me in the Kitchen

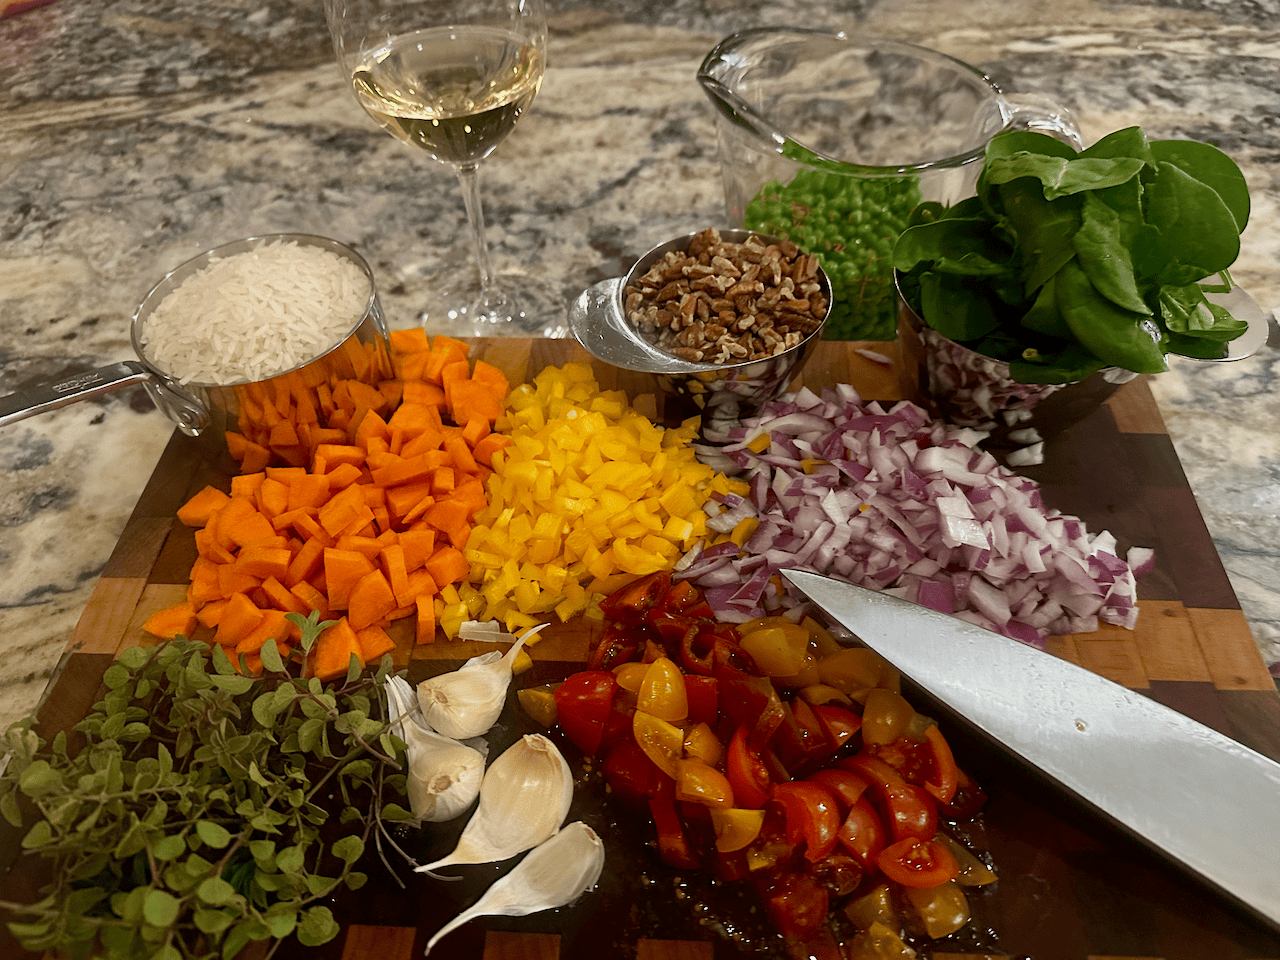
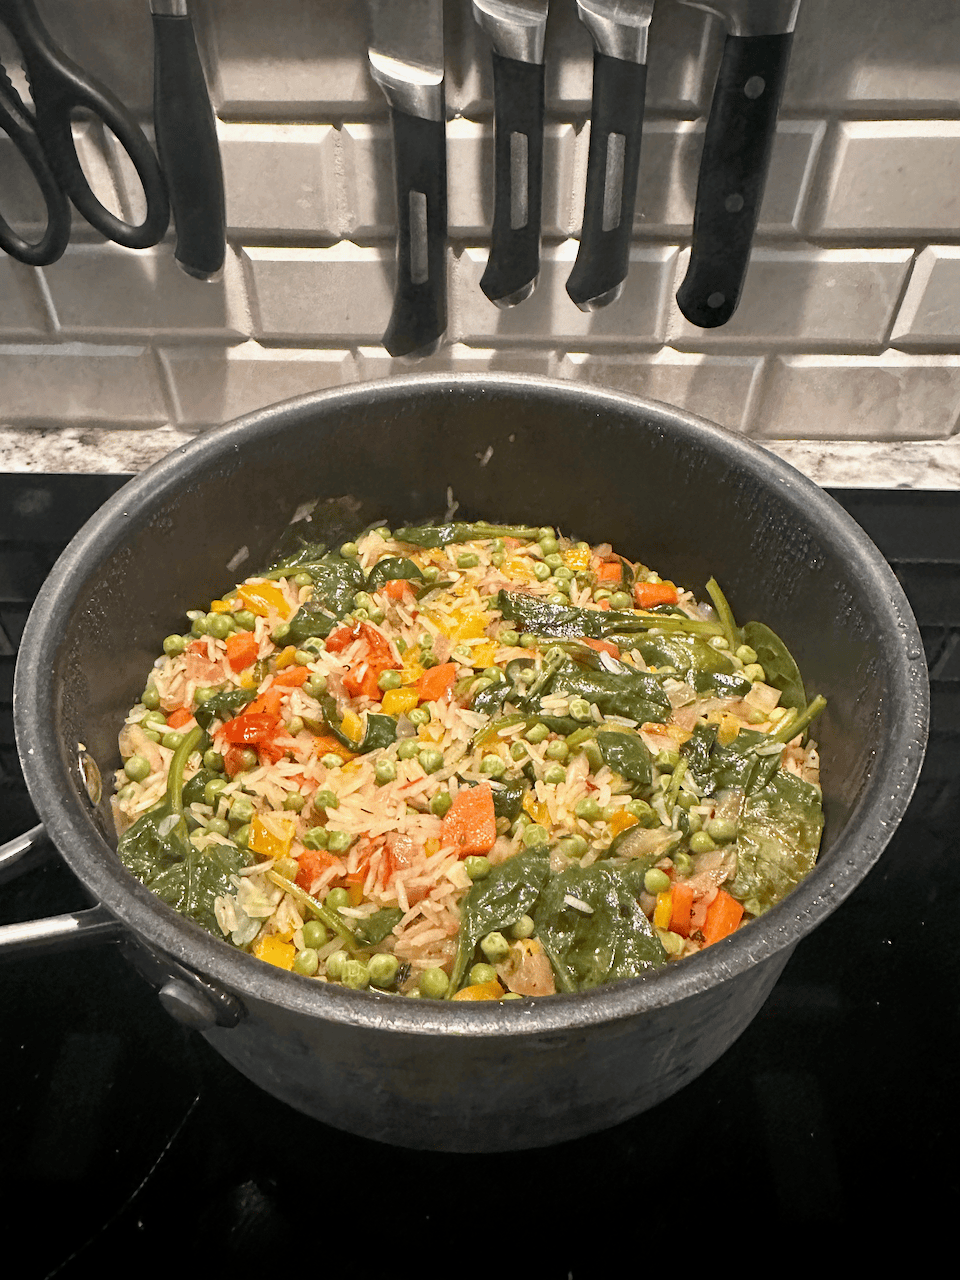
Prepared ingredients for vegetable rice pilaf arranged before cooking
Gather the prepped ingredients first
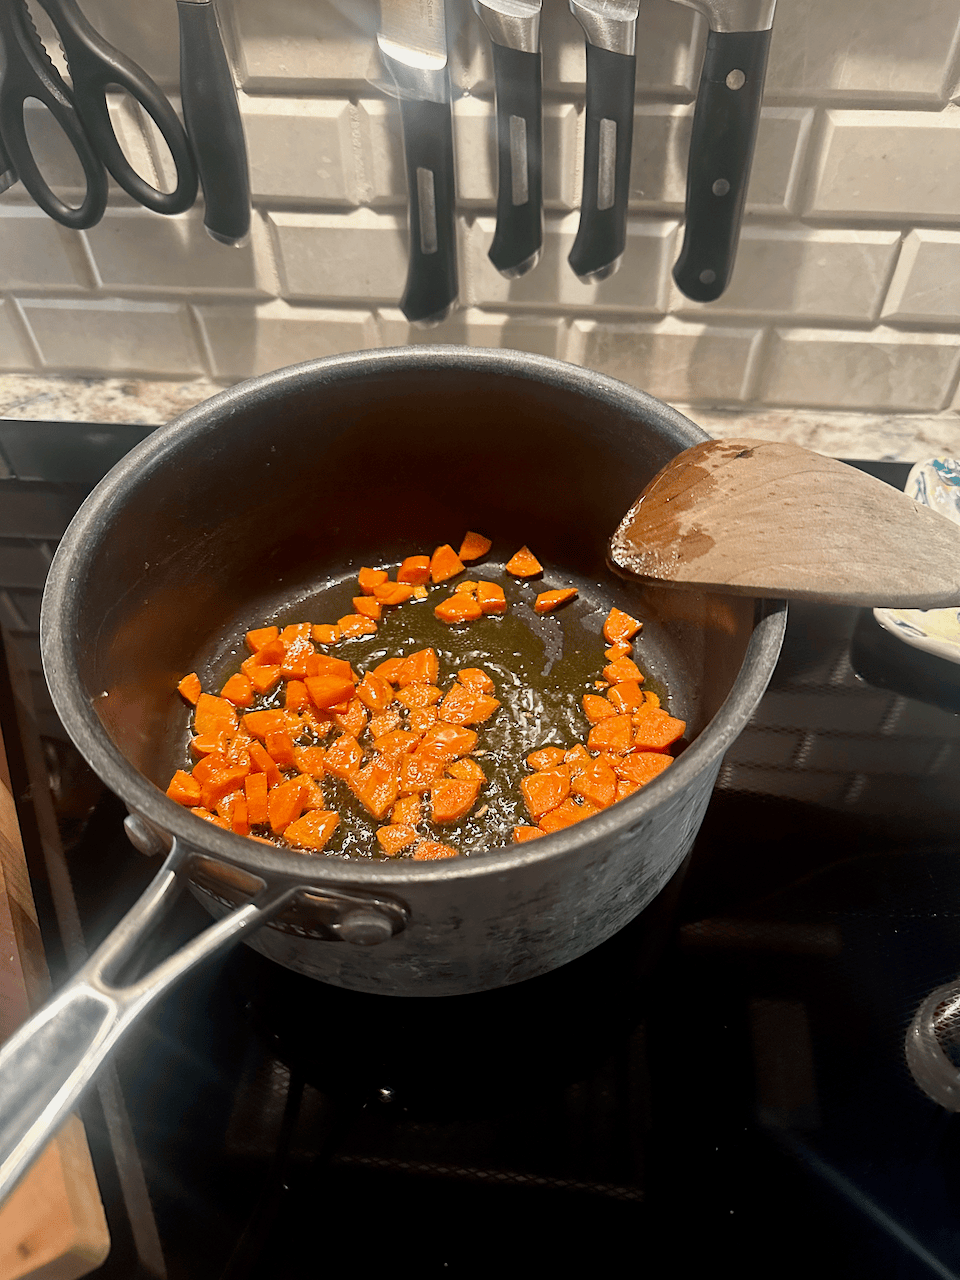
Sliced carrots sautéing in butter for vegetable rice pilaf
Give the carrots a quick sauté before the other vegetables
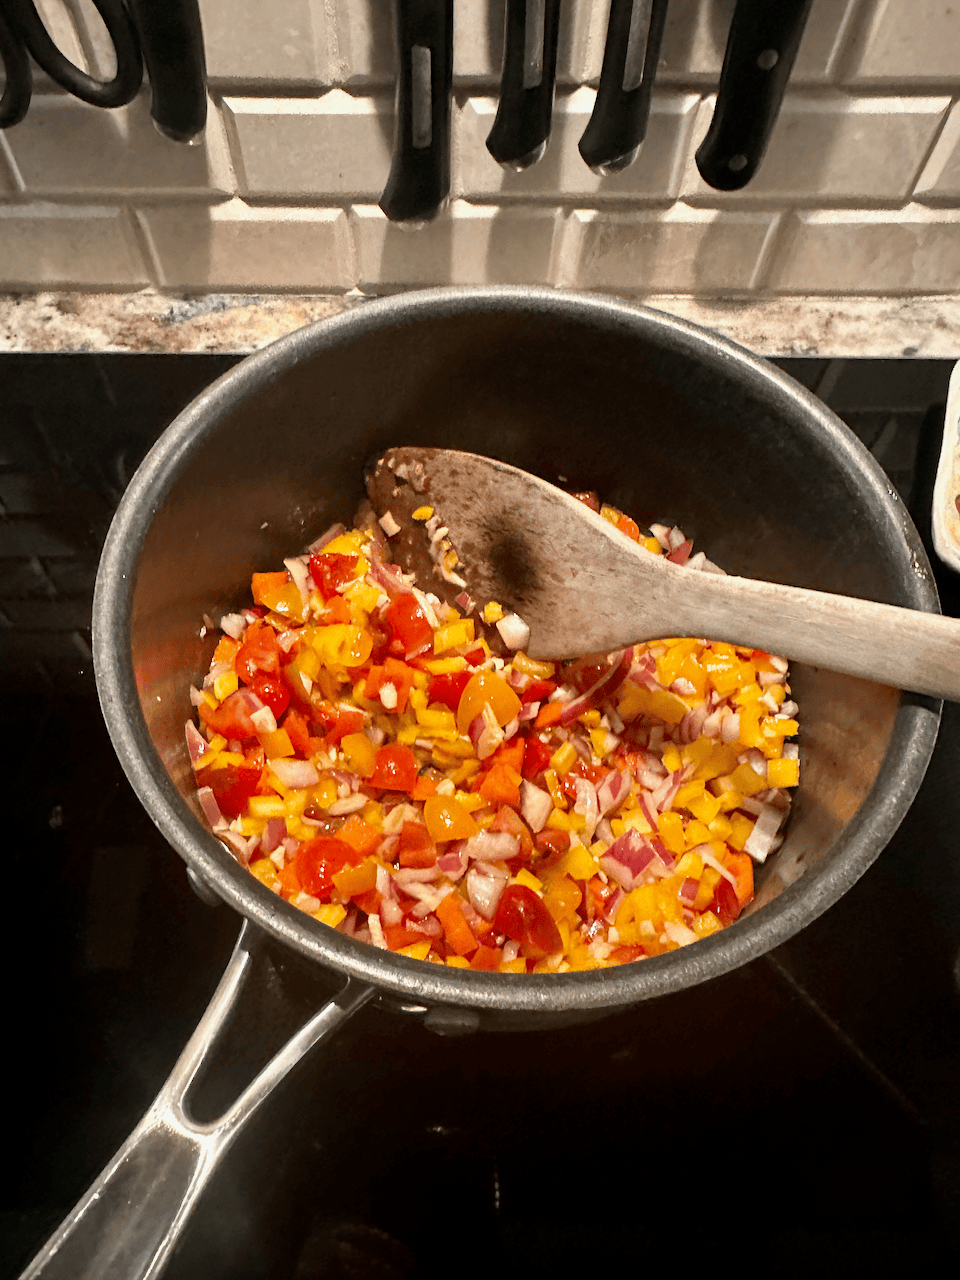
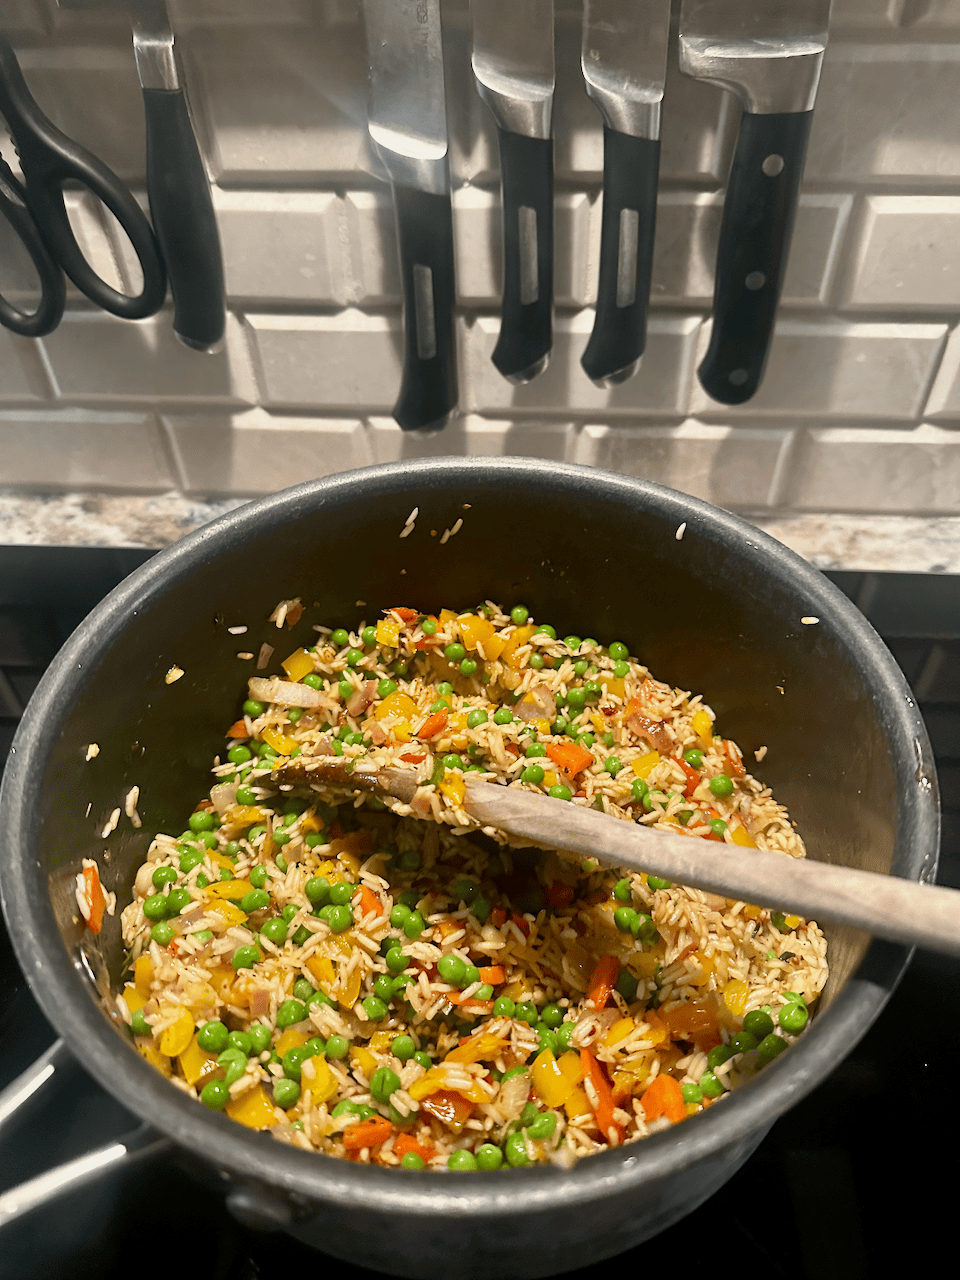
Bell pepper, red onion, garlic and tomatoes added to sautéed carrots
Add the bell pepper, red onion, garlic and tomatoes
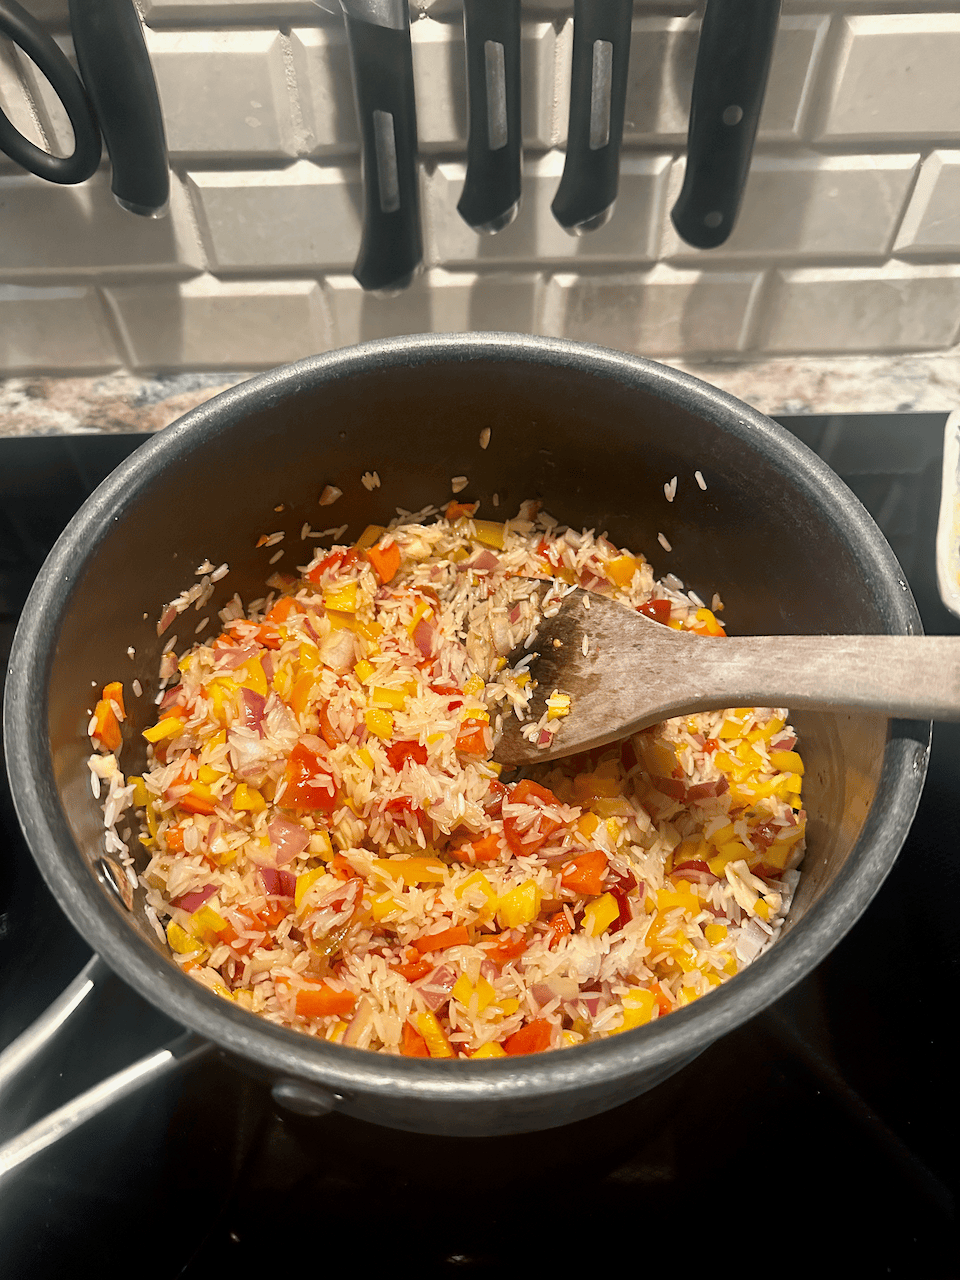
Jasmine rice added to sautéed vegetables in a saucepan
Next comes the rice
Peas added to the vegetable and rice mixture
Then the peas
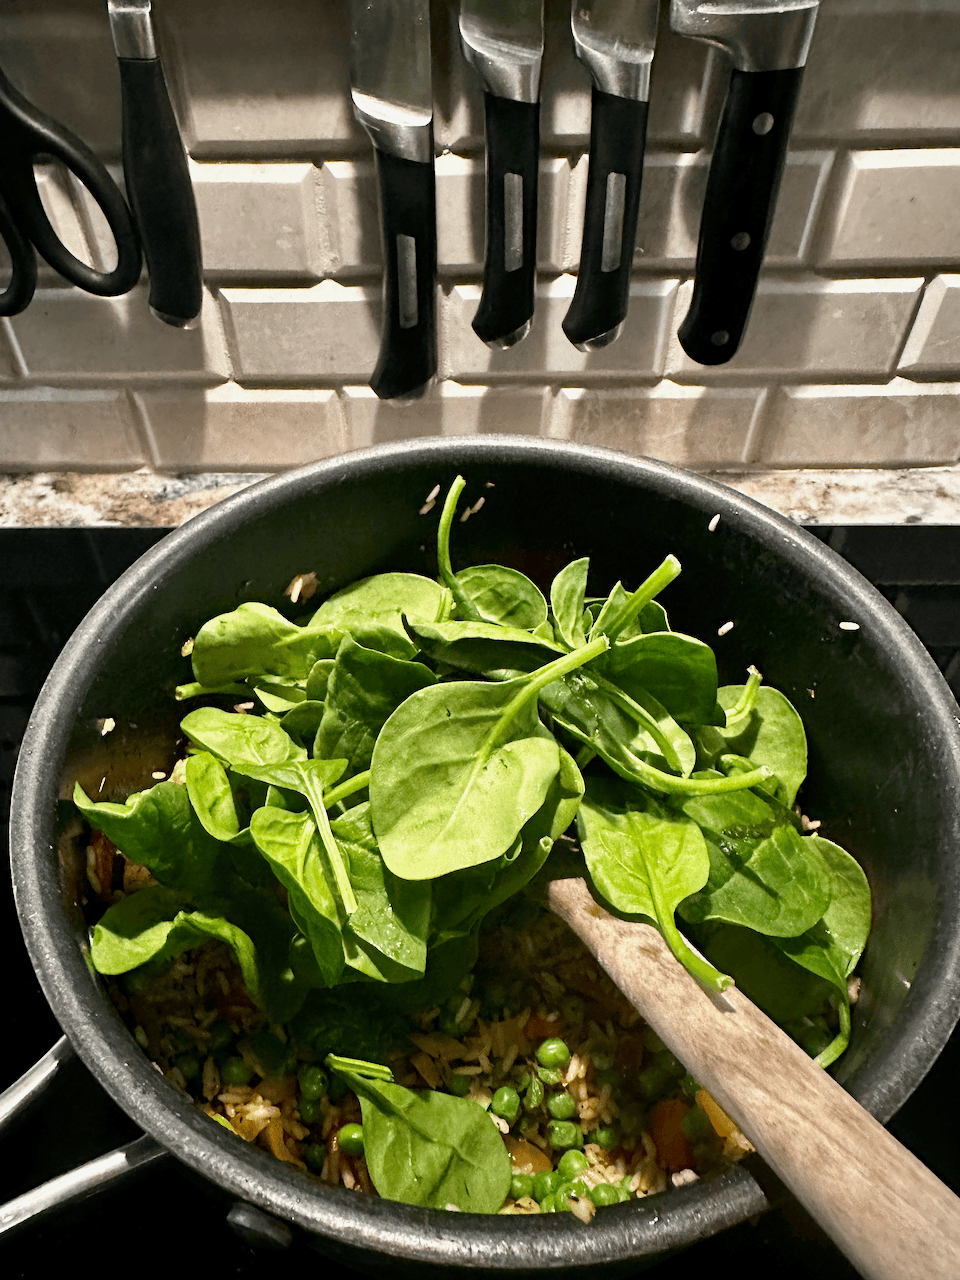
Fresh spinach added to the vegetable rice pilaf mixture
Then the spinach
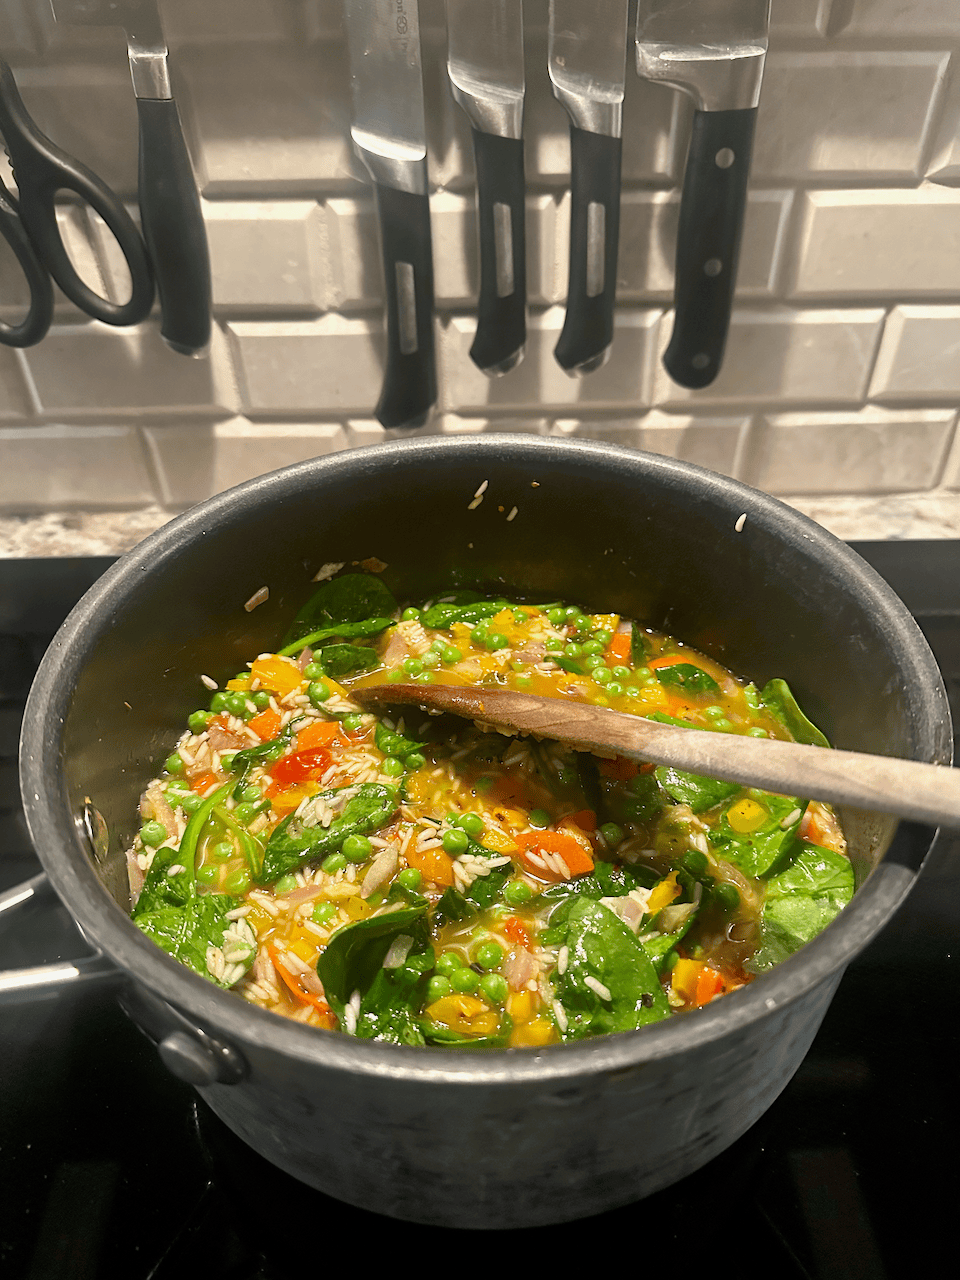
Cooking liquid being poured into the seasoned vegetable rice mixture
Then the cooking liquid
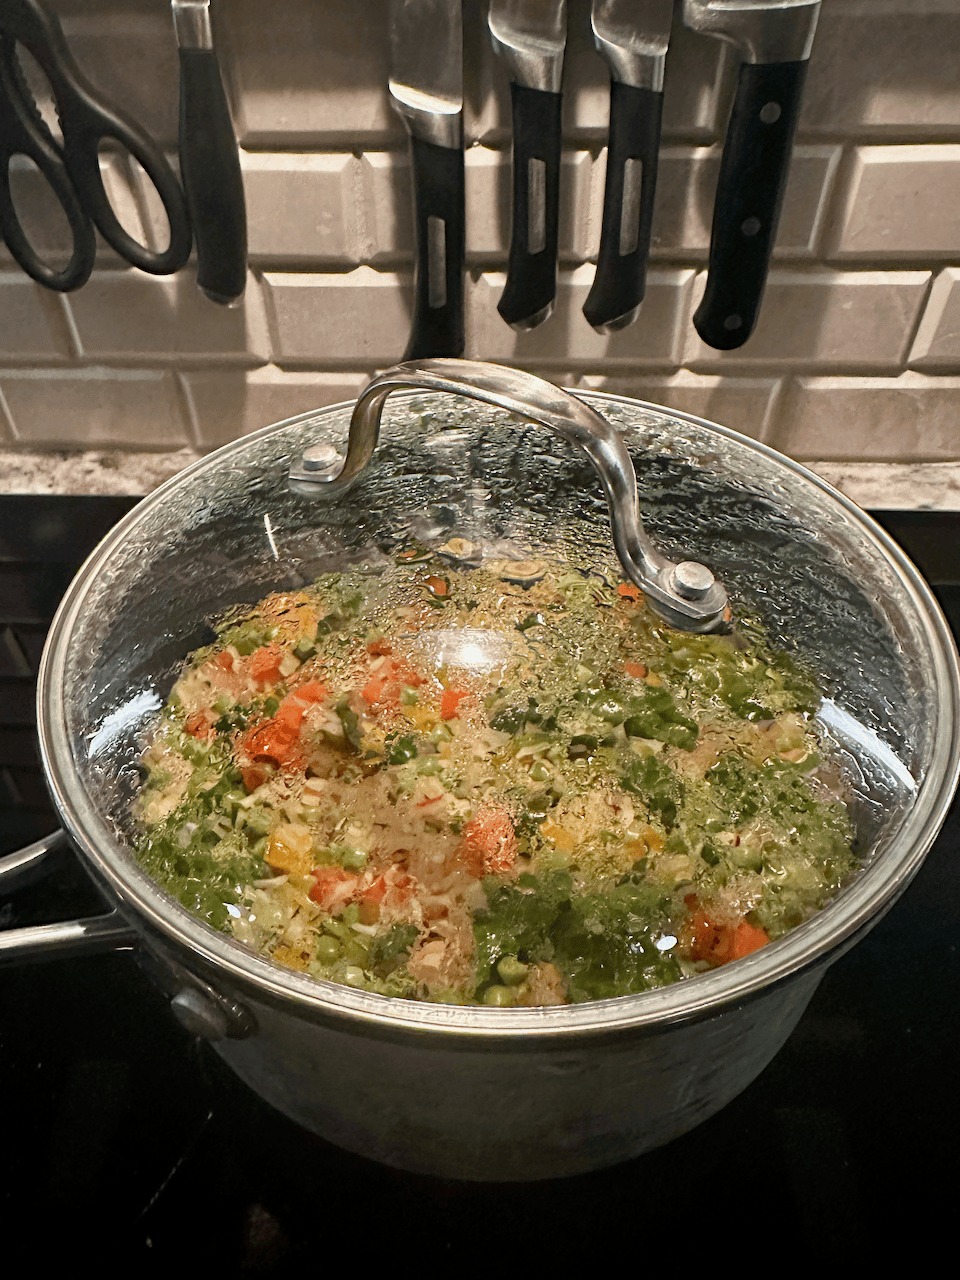
Vegetable rice pilaf mixture brought to a boil before being covered and simmered
Bring to a boil, cover, lower the heat and wait for the goodness
Cooked vegetable rice pilaf before toasted nuts are stirred in
Done and ready for the toasted nuts
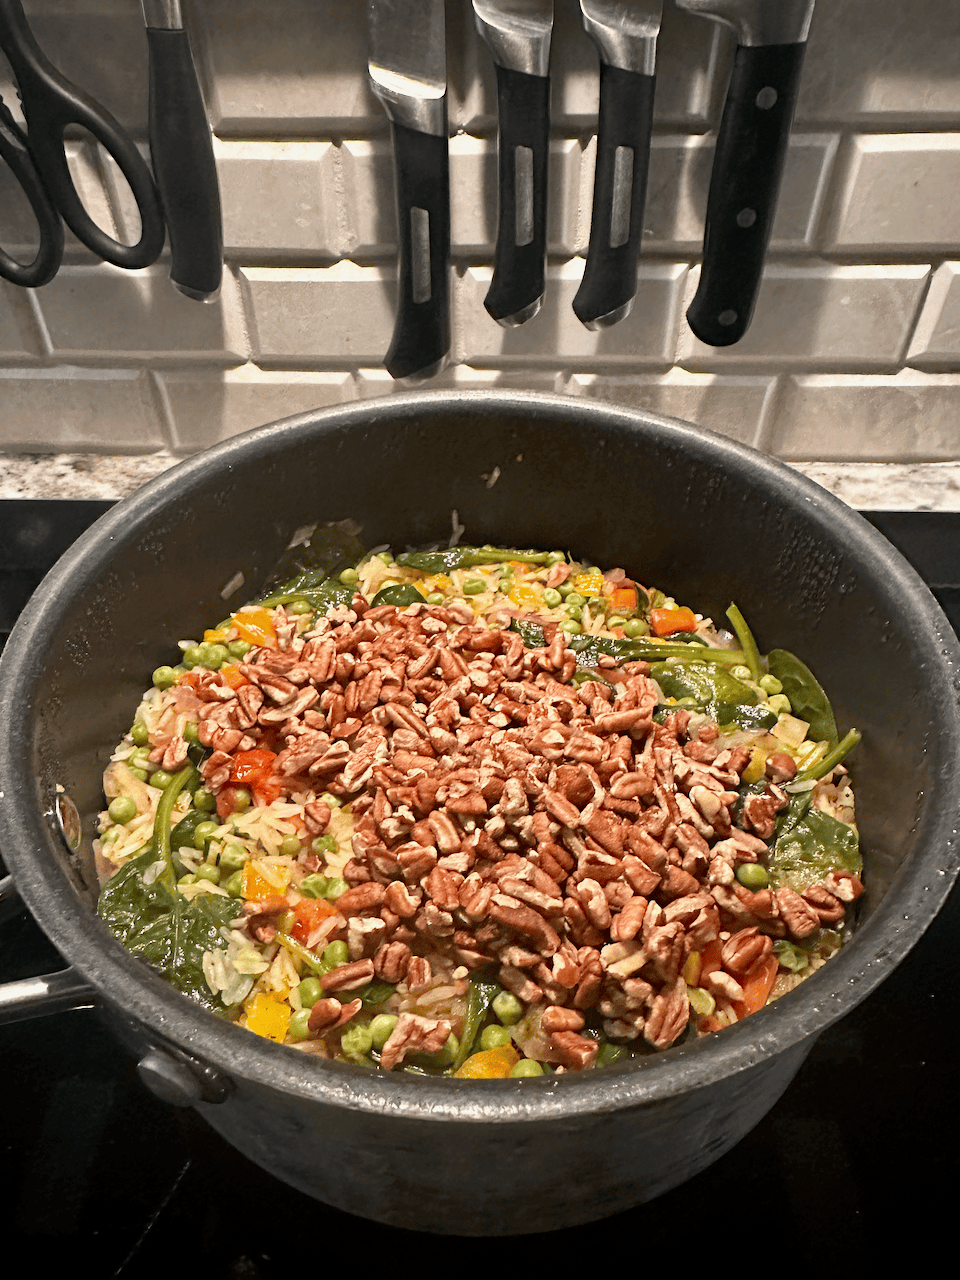
Toasted nuts being added to the finished vegetable rice pilaf
Finished vegetable rice pilaf with colorful vegetables and toasted nuts
Vegetable rice pilaf served with plank-grilled salmon
With our plank-grilled salmon
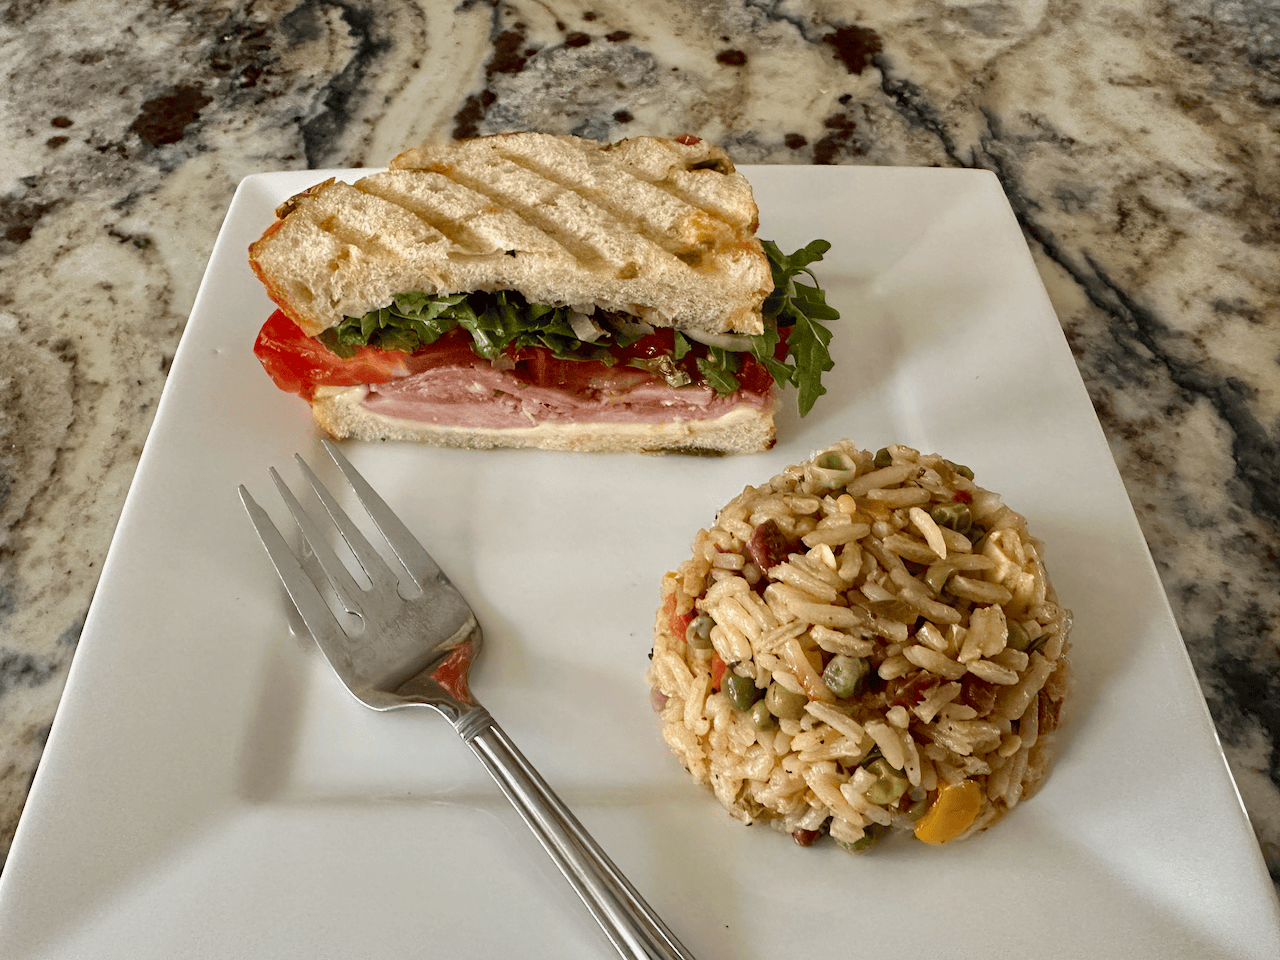
Vegetable rice pilaf served alongside a ham sandwich for lunch
Alongside a delicious ham sandwich for a weekday lunch, this rice is the bomb!

© 2025 and 2026, Glover Gardens

Brrr! Make This Hearty Zippy Sicilian Vegetable Soup to Keep Warm!

Brrr! Make This Hearty Zippy Sicilian Vegetable Soup to Keep Warm!

A warming winter soup with a variety of vegetables and smoked ham hocks, with a kick from our Zippy Sicilian.

Zippy Blueberry Spice Muffins: A Flavorful Twist

Zippy Blueberry Spice Muffins: A Flavorful Twist

Blueberry muffins are a comforting yet predictable treat. This recipe reinvents them with our “Zippy Autumn” spice mix, enhancing flavor and making them a standout at any meal.

Nacho Basics: Easy Steps for Creating Crunchy, Cheesy Goodness You Can Eat with Your Hands

Nacho Basics: Easy Steps for Creating Crunchy, Cheesy Goodness You Can Eat with Your Hands

Need a throw-down dinner and only have a few things on hand? 

Nachos are your friend. They aren’t just any friend, but the “call me if you have a flat tire at midnight or a bad breakup” kind of friend. They’re on standby. They are here for you.

Nachos are Tex-Mex royalty, as American as a hamburger down in these parts (Southeast Texas).

Nachos are fun food, because you eat them with your hands (unless they’re the messy piled high kind), and who doesn’t feel all festive and relaxed with a warm, cheesy chip in one hand and a cold beverage in the other?

Nachos are a great way to use leftovers. They’re also quick, easy and delicious, and there’s a formula for making them that doesn’t need a recipe. Check out the steps below, and don’t worry too much about amounts. Just spread out at least a few more chips than you think your diners can eat, and top with what you’ve got. Don’t worry about what to do with the leftovers, either; day-old nachos make FABULOUS migas or frittatas.

Nachos Formula (Not a Recipe, Just Guidelines)

The Bare Necessities

There are only three absolutely necessary ingredients:

  • Tortilla chips, arranged on a baking sheet
  • Cheese that melts nicely (I like cheddar and/or Monterrey jack), layered on the chips and baked in a very hot oven for 4-5 minutes
  • Salsa or hot sauce of some kind, when serving

Those are the minimum ingredients for making nachos, and I wouldn’t turn up my nose if someone offered me a plate of these crispy, cheesy bites on a workday when I’m tired from the commute. Of course, it’s even better with jalapenos, and the add-ons I’m about to tell you about. Note: you should have all of your extras prepped and ready before you get started.

A Little Bit More

Basic additions before baking that give nachos more depth of flavor and expand the fun include:

  • Beans, either refried or whole; spread refried beans onto the chips before you add the cheese, but with whole beans (black are best), drain them and add to the chips only after sprinkling on the cheese
  • Onions
  • Fresh or pickled jalapeños or other peppers
  • Grilled vegetables, which can also be added after baking, if they’re heated

Amping Up the Protein

Up until this point, your nachos are vegetarian (if your beans weren’t cooked with animal fat). But proteins are also fab with nachos, and can include a variety of pre-cooked wonderfulness and leftovers:

  • Beef – taco meat, leftover steak, fajitas, plain ground beef (if you do that kind of thing), chili (with beans or without), brisket, etc.
  • Pork – pulled pork (see our recipes here and here), ground pork, chorizo, even sausage
  • Chicken – shredded or cubed from leftovers
  • Shrimp, crab, crawfish
  • Grilled or steamed fish (check out our Congo Square Fish Nachos recipe – pic below)

More Cheese, Please!

You can either add your meaty or fishy delights before or after baking. Either way, they should be heated. Your nachos will be crunchier if you add any really heavy toppings after the baking, but you’ll want to add more cheese on the top of your protein. Pop your baking sheet back into the oven if you added that leftover chili or pulled pork after the initial baking and give it a quick broil until your cheese sizzles and drives you wild with nacho-loving anticipation.

After the Nice Warm Nacho Sauna in the Oven, Some Toppings

While a nacho with only the bare necessities as listed above beat a fast food ANYTHING any day of the week, my preference is to add some yummy toppings to dress them up after the baking, which can include:

  • Tomatoes
  • Onions
  • More fresh or pickled jalapeños or other peppers
  • Cilantro
  • Pico de gallo (see recipe; it’s basically a combo of all of the above, with lime juice)
  • Sliced avocado
  • Sliced black olives
  • Thinly sliced radishes
  • Baby spinach or arugula
  • Shredded cabbage
  • Fresh corn, sliced off of the cob
  • Extra cheese, like cotija or feta
  • Depending on the nacho’s flavor profile, maybe even fruit—small chunks of pineapple on our Congo Square Nachos would have been fabulous

Sauces and Condiments to Bring It on Home to Mama

My preferred nacho nirvana includes happy-making condiments and sauces, which can either be left on the side so that individuals can add their own, or mounded on top to show the bounty that nachos truly are. These include:

  • Sour cream
  • Guacamole or green sauce from tomatillos
  • Salsa (see recipes for our Roasted Red Salsa and Glover Gardens Salsa), or use a fruit salsa like with did with our Palisade peaches in Colorado
  • Hot sauces like Salsa Macha, Tabasco or Sriracha

What to Serve with Nachos

In my book, nachos are a one-dish meal, especially if you’ve given them some love with protein and fresh ingredients. No need to scurry around finding a side dish – it’s right on top of those warm, cheesy chips!

Beverage-wise, a cold lager or Mexican beer is nice, or a light white wine like sauvignon blanc. Or you can match the beverage to the protein; for instance, if you are dressing up your nachos with some leftover steak, serve them alongside an appropriate red wine, like a pinot noir or a malbec.

If you prefer non-alcoholic drinks, you really can’t beat iced tea or Dr. Pepper.

Wrap-Up

Let’s review:

  • The bare necessities are the backbone of your nachos (chips, cheese and a spicy condiment for serving)
  • A little bit more is optional, but adds depth and character before baking (like beans, jalapenos, onions, grilled vegetables)
  • Amping up the protein is also optional, but uber-good, and you can choose from a huge variety of meat and fish (I am the self-proclaimed Duchess of Leftovers and view almost all protein leftovers in the fridge as potential nachos fare)
  • Sauces and condiments are optional, too, but they bring it on home, and the possibilities are only limited by your individual tastes

You can go to nacho heaven with basically any combination of those steps above, and put together a really fast—and really satisfying—dinner. I do it all the time when there are odd leftovers, and no one has EVER said, “What? Nachos AGAIN?”

And they never will.

© Glover Gardens, 2024

Roasted Salsa Macha Asparagus with Hollandaise

Roasted Salsa Macha Asparagus with Hollandaise

Recipe for a wonderful asparagus treat that can be a starter, a stalwart partner alongside a steak or other big protein, or a centerpiece for a vegetarian meal. This roasted asparagus is simple, savory, al denté and foodie-worthy.

Recipe Time: Roasted Red Salsa for the Win!

Recipe Time: Roasted Red Salsa for the Win!

With a vibrant array of flavors, this roasted salsa is perfect for dipping or as a topping, leaving a lingering, crave-worthy taste that’s both bold and refreshing.

Spicy West African Jollof Rice Recipe for a Crowd

Spicy West African Jollof Rice Recipe for a Crowd

My son and I had some chicken and rice cooking adventures last summer when he was home from grad school, which were captured here, of course. 😊 This post is a follow-up, with a well-tested recipe!

Our experiments were a lot of fun, and he has replicated some of our kitchen successes throughout his recent school year at the University of Miami, the second of a 3-year doctorate. I love getting pictures of him and his friends with the plates of food they’ve made together, and imagining their conversations. (The youth will save the world, my friends, and they’re planning it over excellent meals.) Anyway, below is one of our cooking adventure posts from last summer.

The instructions for some of the internet recipes we used last summer in our test kitchen here at Glover Gardens were a little convoluted and amounts were laughably incorrect (as in the liquid-to-rice ratio), so we took time to document our own version of the favorite find from last summer, the Jollof rice. It’s a classic dish from West Africa but has many variations across many nations, and this one is our Glover Gardens take on it. Jollof rice has an incredible depth of flavor which somehow conjures its long history. But beware, it is spicy!

Recipe: Spicy Jollof Rice for a Crowd

Makes 12 servings

Ingredients

  • 1 tbsp + 1 tsp white pepper
  • 1 tbsp + 1 tsp curry powder
  • 1 tbsp + 1 tsp dried thyme
  • 2½ tsp powdered ginger
  • 1½ tsp salt
  • 3 medium ripe tomatoes, halved
  • 2 red onions, divided – one thinly sliced and the other peeled and quartered
  • 1 large red bell pepper, halved and seeded
  • 2 red chilis or serrano peppers, stems removed, seeded if you prefer it less spicy
  • 1-2 scotch bonnets or habaneros, stems removed and seeded if you prefer it less spicy
  • 1 cup plus 1 tbsp olive oil, divided
  • 2 cups basmati rice
  • 4 cups chicken broth or stock, or 4 cups of liquid mixed with chicken bouillon (use vegetable stock or bouillion for a vegetarian version)
  • 4 tbsp tomato paste 
  • 3 bay leaves
  • Additional salt and pepper
  • Optional garnish: any combination of thinly sliced chiles, chopped red onion, tomato, parsely or bell pepper

Cooking Instructions

Mix the spices and salt together in a small bowl and set aside.

Preheat the oven to 450º. Cover a baking sheet with foil and spray with cooking spray, then arrange the tomatoes, quartered red onion, bell pepper, red chilies and scotch bonnets on the sheet.  Drizzle with a tablespoon (or more) of olive oil, sprinkle with a little salt and pepper, then roast for 35 minutes or until the edges are nicely browned. 

While the vegetables are roasting, rinse the rice by placing it in a large bowl and covering it with water. Using your hand or a spoon, gently swirl the rice around until the water becomes cloudy. Pour out the water through a strainer and repeat until the water is clear, about three to four rinses. Strain it and set aside.

After roasting, let the vegetables cool for a few minutes, then add them to the blender and blend on high until smooth and pureed. (You can also use an immersion blender or a food processor for this step.) Set aside.

Heat a 3 quart or larger saucepan or dutch oven on medium-high heat. Get a sheet of aluminum foil ready that will cover the pan and set aside. Add the 1/4 cup olive oil to the pan and and the sliced red onion and bay leaves and sauté for several minutes until the onions soften, stirring frequently with a wooden spatula, then stir in the tomato paste and the spice mix. Sauté for a few more minutes, then add the sauce from the roasted vegetables. Stir continuously, cooking until the mixture has reduced by about 30% and thickened slightly.

Add the rice to the pan and stir for about two minutes, then add the chicken broth or stock and stir again. Taste to ensure that the broth is salty enough, adding an additional ½ tsp of salt if it is lacking. Turn the heat to high, bringing the mixture to a boil while stirring constantly, then cover the pot tightly with aluminum foil and place the lid on top. Turn the heat immediately to low and simmer for 20 minutes. Do not remove the lid. When the 20 minutes are up, turn off the burner without removing the lid and let the rice sit and steam for another 15 minutes. The deep red sauce from the roasted vegetables will have settled at the top. Fluff the rice up using a spoon and serve. 

Cooking Notes:

AI-generated image with Jollof rice and spices
  • Jollof rice can be made as an all-in-one chicken and rice dish by adding 2 cups of chopped or shredded chicken to the rice mixture when you add the chicken broth. 
  • You can also add any other protein, either before or after you cook the rice, like sausage, beef, pork, or even shrimp or tofu (after cooking, in that case).
  • If you don’t like it spicy, you can leave out the habanero or scotch bonnet.
  • The garnish is listed as optional, but this dish really benefits from the brightness of a fresh garnish, and the added texture; if you can only do one garnish, choose the red onion.
  • This is a big-batch recipe, so you should halve it or even third it if you’re cooking small, although… it freezes well, AND, there are so many things you can do with the leftovers! Check out a few here.

Image generated via AI Art


Jollof Rice had a Starring Role on Our Mother’s Day Table

Back in Miami, my son made this dish several times since we pioneered it last summer after I wrote out our version for him. Knowing he was now a Jollof Pro, I requested it when he was briefly home for Mother’s Day last weekend. My other request was for The Grill-Meister to make his rotisserie-grilled cornish game hens, which he covers liberally with our Zippy Southwest spice mix.

This was a great combination! Here’s my quickly-snapped photo just before we headed to the table and dove in to the flavor party. We served the meal with spiced-up French bread, hot honey and a Tabasco condiment on the side… oo la la!

Join Us in the Kitchen

Since it was Mother’s Day, I was sipping a chardonnay and basking in the glow of all this cooking that was happening for me, and I wasn’t super-thorough with the photo-documentation of the recipe as it unfolded. But here are some pics from along the way, when I remembered.

And here’s the result, a close-up on the plate.

This is Such a Big Batch… What Can I Do with the Leftovers?

I smiled to myself today as I was freezing what’s left of the Jollof rice after lunch today. There’s easy goodness in my future!


Here’s one thing I can do: switch the Jollof rice for risotto and make pan-fried Jollof rice cakes. I’ll base it on my risotto cakes recipe (post is below), modified slightly for the different flavor profile. Then it will be a differently fab side dish.

Pan-Fried Jollof Rice Cakes Recipe

Serves 4-6

Ingredients

  • 1 1/2 cups panko breadcrumbs
  • 1/2 tsp dried oregano
  • 1/4 tsp salt
  • about ten turns of freshly ground pepper, or 1/4 tsp ground black pepper
  • 3 cups leftover Jollof rice, chilled
  • about 3/4 cup vegetable oil

Cooking Instructions

Put the panko breadcrumbs in a shallow bowl or pie plate and add the salt and oregano. Stir to mix.

Shape the Jollof rice into patties by scooping about 1/4 – 1/3 cup at a time (I use an ice cream scoop), patting them into a ball and then flattening to be about 2 1/2 inches in diameter and 3/4 inch thick. Dredge each patty in the breadcrumbs, covering the edges as well, gently pressing in the crumbs. Put them on a small cookie sheet, cover, and refrigerate for at least 30 minutes.

Line a small platter or cookie sheet with paper towels. Heat the oil in a skillet (preferably cast iron) to medium-high, and when the oil is hot, add the risotto cakes, being careful not to crowd them. Cook until they are golden brown, around 3 minutes on each side. Turn carefully to avoid breaking them. Use a slotted spoon to transfer the risotto cakes to the paper towels, let them cool slightly, and serve.

Optional garnish: sour cream, parsley and/or chopped red onions.

Other options will be:

  • Stuffing bell peppers with this spicy rice and a little cheese, perhaps Monterrey Jack
  • Making Jollof fried rice, adding egg and perhaps a bit of spicy sausage
  • Using Jollof rice in a spinach wrap, with avocado, fresh baby spinach, sour cream and red onion for a vegetarian version, and adding chicken, shrimp or any other protein that tickles your fancy for a carnivore’s delight

I’ll let you know! And you should let ME know if you have other ideas for leftovers, or if you make this spicy fun dish yourself.

Speaking of fun, I learned on Wikipedia that in West Africa, there’s saying that “a party without Jollof rice is just a meeting”. In Nigeria the term, “See Jollof” means “see how much fun is being had,” and in some places, there’s a variation called “party Jollof”, which is cooked outside over a wood fire, which produces a nice crusty bottom. Must try this! Now I just need a mechanism for building a wood fire… sounds like a task for The Grill-Meister!

© 2024, Glover Gardens

Color My World with a Vegetable Grazing Board

Color My World with a Vegetable Grazing Board

Joy comes from connecting with other people, especially when you get to participate in their special moments, like my recent opportunity to contribute a vegetable grazing board to the menu for a 95th birthday party. Check it out and learn from my experience.

Try Our Zippy Sicilian White Bean Spread

Try Our Zippy Sicilian White Bean Spread

Bright green herbs with lemon juice and zest make this white bean spread a very fresh-tasting condiment that goes perfectly on a vegetable grazing board and can be used in a myriad of other ways.

You Need the Glover Gardens Nutty Pesto Recipe in Your Life

You Need the Glover Gardens Nutty Pesto Recipe in Your Life

Pesto is one of the most versatile flavor boosters you can have in your refrigerator. This Glover Gardens basil pesto recipe is extra nutty thanks to roasted mixed nuts and fresh walnuts or pecans, and it comes together quickly in a food processor. Once you have a jar on hand, you’ll find endless ways to use pesto—from pasta and panini to burgers, vegetables and even omelets.


Any cook worth their kosher salt knows that there are endless – and endlessly wonderful – variations of pesto.  The Glover Gardens version is fairly straightforward, with the exception of the nuts.  The classic pesto recipe calls for pine nuts, but I like to boost the nuttiness factor with a combination of roasted mixed nuts along with fresh walnuts or pecans.  This double-whammy of different nuts gives the pesto a deeper, richer flavor, and if I don’t watch closely, The Grill-Meister will steal it right out of the food processor, using it as a spread on water crackers or just dipping in with a spoon (the nerve!).

Basil thriving at Glover Gardens

Make the pesto while the summer basil plants are thriving; they tend to last into mid-fall, only fading out in late October or early November here in Southeast Texas. Or you can source fresh basil almost year-round at the grocery stores these days.

Glover Gardens Nutty Pesto Recipe

This Glover Gardens version is extra nutty thanks to roasted mixed nuts and fresh walnuts or pecans—an herby, garlicky powerhouse for pasta, burgers, panini, vegetables and more.
Prep Time 30 minutes

Ingredients
  

  • 1 cup roasted and salted mixed nuts, like Planters Deluxe
  • ½ cup pecans or walnuts, not roasted
  • 12 medium to large garlic cloves, peeled
  • 2 cups fresh basil leaves, tightly packed
  • 1 cup fresh flat-leaf parsley
  • ¾ cup freshly ground Romano or Parmesan cheese (not from a green paper jar!)
  • 2 cups good-quality extra virgin olive oil
  • 1 tsp. red wine vinegar
  • 2 pinches of red pepper flakes
  • ½ tsp. freshly ground pepper or more, to taste
  • ¾ tsp. salt or more, to taste

Equipment

  • Food processor or blender

Instructions
 

  1. Purée the nuts and garlic in a food processor or blender, stopping to scrape the sides several times. The mixture should be a thick paste.
  2. Add the basil, parley and cheese and puree the mixture again.
  3. With the motor running, pour in the olive oil.
  4. Add the salt, pepper, red pepper and vinegar, then process again.
  5. Taste and add more salt and pepper if necessary.

Notes

This recipe yields a Texas-sized batch of pesto, since we usually make it before an epic long weekend with guests at Glover Gardens and have tons of uses for its magical herby-nutty-garlicky goodness. It will keep in the refrigerator for two to three weeks. You can make a half batch if you don’t need this much, or you can freeze some of it in ice trays to use in small amounts over the next six months.

Tried this recipe?

Tell us how it went! →

Join Me in the Kitchen

These pictures were taken while I was making a half batch for our empty-nester household. But I recommend making the full amount whenever possible – this is a popular condiment and you can always give some away in little jars to grateful neighbors and coworkers.

Pesto is a Wonder Condiment!

How can I use this pesto, you might ask. Let me count the ways!

A no-brainer is as a sauce for pasta. Just toss some with your choice of pasta after its cooked but while its still hot and served immediately. You could jazz it up with additional ingredients like chicken or shrimp if you wanted, but it really only needs a little more salt, pepper and grated parmesan or romano, and perhaps a basil leaf or other green garnish. For a more substantive dish – and no extra work – choose premade tortellini or ravioli.

Man plating pasta with pesto
Photo by Nadin Sh on Pexels.com

There are lots of other ways to use pesto with pasta, but I’ll leave that for another post. Let’s check out some Glover Gardens pesto uses. (Click the links in the captions for recipes and posts.)

Pesto is Great on a Burger

Pesto is Great IN a Burger

Pesto is Great on a Panini

Pesto Butter is Another Worthy Condiment

Pesto butter isn’t just good as a dip for radishes – you can spread it on french bread and toast it for an alternative to garlic bread or use it as a spread for corn on the cob. It’s fabulous!

Pesto is Perfect for Pizza

Pesto is Welcome on an Appetizer Platter

Pesto Adds to an Omelet

Pesto is a Fab Dip for a Veggie Platter

Pesto plays a starring role on a veggie platter and makes it easy to say, “Yes, Mom, we ate our vegetables!”

15 More Delicious Ways to Use Homemade Pesto

There are endless possibilities for adding flavor with pesto; here are some more:

  • Swirl into eggs as you’re scrambling them or add to a frittata
  • Pour atop cream cheese or goat cheese to make a quick throwdown spread
  • Mix with sour cream or plain Greek yogurt to make a dip
  • Toss with steamed asparagus, broccoli, green beans, brussels sprouts or peas to spice them up
  • Add a layer of pesto into your next lasagna
  • Add a dollop to brighten up a soup, like tomato soup or Glover Gardens Cauliflower Soup
  • Use it as a dressing for pasta salad
  • Toss with boiled new potatoes and chopped green onions for a take on potato salad
  • Make finger sandwiches using pesto and cream cheese
  • Add to sauteed mushrooms
  • Add to risotto or other rice
  • Tuck it under the skin before roasting a chicken or turkey
  • Drizzle on grilled meat or fish after cooking
  • Toss with mozzarella pearls and grape tomatoes for a quick side salad
  • Add it atop a store-bought hummus to give it some class

A jar of pesto in the refrigerator is a little culinary superpower. Whether you’re spreading it on a burger, tossing it with pasta, or brightening up vegetables, this Glover Gardens pesto adds instant flavor.

© 2023, Glover Gardens

New Recipe! Roasted Sweet Potatoes with Goat Cheese and Balsamic Vinegar

New Recipe! Roasted Sweet Potatoes with Goat Cheese and Balsamic Vinegar

Sweet potatoes roasted with a spicy-sweet rub get all dressed up with goat cheese and balsamic vinegar, making this a great dish for the holiday table.

In Appreciation of… Belgian Endive

In Appreciation of… Belgian Endive

Did you know that Belgian endive grows in the dark?

Image from SpecialtyProduce.com

I didn’t, until today when I preparing this post.

Here’s the story: a Belgian farmer stored his chicory roots in the cellar as he headed off to the war for Belgium’s independence from The Netherlands in 1830, and when he returned (apparently unharmed from the very short war) they had a surprise for him: the roots had grown into little bulbs with new albino leaves. Voila, a new and wonderful type of vegetable was born, a crunchy, slightly bitter, nutty head of golden-white leaves that are rich in vitamins and minerals and can be eaten raw or cooked.

I really like Belgian endive, and I appreciate that Belgian farmer, whose name was Jan Lammers. I wonder why the vitamin-laden endive variant wasn’t named after him, and how the rest of the world found out about it.

That’s why I’m writing about Belgian endive today. In its raw form, with its clean, crisp flavor and boat-like shape, this little finger-sized leaf is a perfect delivery device for richer foods. That’s how I like to use it; I’ve actually never cooked Belgian endive.

Here are a few examples from the Glover Gardens table, some from the blog archives, and a couple more recent dishes that haven’t made it onto these pages yet.

Belgian endive looking ever-so-tasty with leftover grilled shrimp on a dollop of guacamole, garnished with cilantro and red onion
A beautiful dish for spring: deviled eggs alongside Belgian endive filled with a Greek-inspired tuna salad
The first time I blogged about Belgian endive
I like to serve Belgian endive in addition to crackers for dips like this one
Belgian endive transform leftover holiday dressing (see post for picture)

Thank you, Jan Lammers. I’m glad you returned from war unharmed to make your important discovery, and I think I will name a dish with Belgian endive after you.

© 2021, Glover Gardens

Green and Yellow Salad with Orange Vinaigrette Packs a Crunch and a Punch

Green and Yellow Salad with Orange Vinaigrette Packs a Crunch and a Punch

Crunchy fennel and corn play nicely with arugula, especially with a vinaigrette that sports orange juice, a little cider vinegar and Dijon for punch and some honey to mellow it out.

Lemon-Dill Zucchini Ribbons Pair Perfectly with a Giant Ribeye

Lemon-Dill Zucchini Ribbons Pair Perfectly with a Giant Ribeye

This light and bright side dish is a winner! It has cherry tomatoes for color and pop, garlic for a savory punch, lemon zest for, well, zestiness, and dill to balance everything. Plus a dollop of creme fraiche.